The UniFi® Controller is an management interface for your network. To learn more about UniFi please visit https://unifi-sdn.ui.com/ In order to fully realize the potential of SwiftConnect™ it is best to have a UniFi environment already setup. Many places of business already have this type of environment working as the UniFi® product line is extraordinarily popular with small to medium size business.
Here is what you need:
- UniFi® controller witth version 5.8.30 or later.
- Your UniFi® controller must be publicly accessible.
- UniFi® access point connected to your controller (UAP-AC-NanoHD or UAP-AC-Lite are great options).
In some circumstances we can configure a controller for you and a pre-configured access point. Please contact sales or support via the contact page if you would like to see if your place of business qualifies for this service.
Here are some of the benefits of having the UniFi® environment setup:
- Automated number and email collections via WiFi (data is collected at the guest portal when users connect to the WiFi).
- Dashboard usage of how your WiFi network is being used.
- Automated emailed monthly reports of your WiFi network sent to your email inbox.
If you already qualify and have everything setup above you are in good shape. When first logging into your dashboard you will be prompted with the UniFi Controller setup wizard:This is where you can enter your credentials to your UniFi® controller. Go ahead and enter your publicly accessible controller address: (https://mycontroller:8443) and click next. Then enter you administrator login and choose the site from the list that you want to use (in most cases there will be only one site listed). Click next and it will run some checks to make sure the correct values are enabled on your UniFi® controller as shown in the image below.
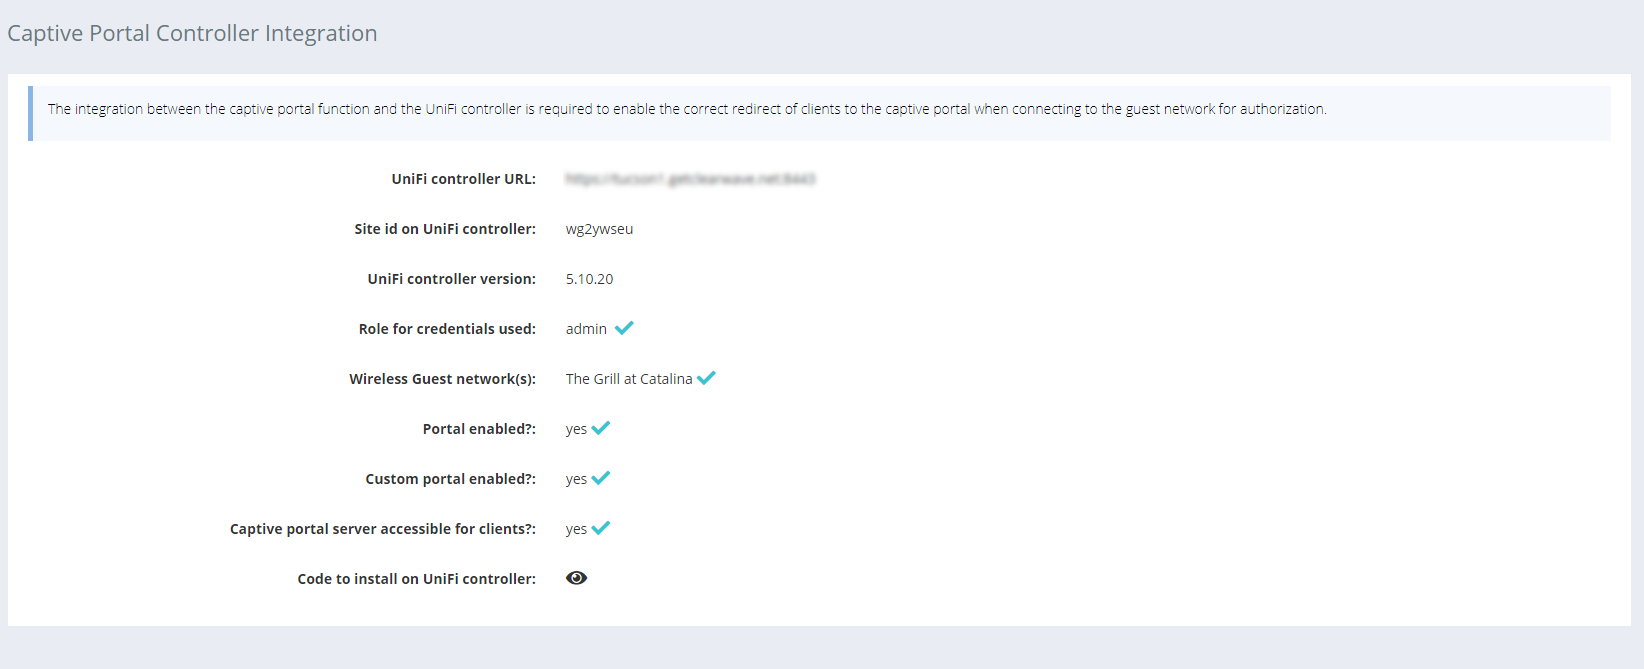
In order to have everything running properly you will need to have a check mark next to each. To ensure everything is setup properly let’s go through each item:
1. Role for credentials used – This needs to be a Super Admin or Admin for the specific site you are adding.
2. Wireless Guest network(s) – Have a WiFi guest network enabled and broadcasting.
3. Portal enabled? – Ensure that the WiFi broadcast you have setup for guests has Guest Policy checked on your UniFi controller.
4. Custom portal enabled?: – Make sure Override Default Templates is checked under Guest Control.
5. Captive portal server accessible for clients – Make sure your dashboard address or sub-domain for SwiftConnect™ is in the Pre-Authorization Access list. This will likely be sc-prod-sfo1-01.myswiftconnect.com or if you have a custom subdomain .myswiftconnect.com.
6. Code to install on UniFi controller – That last thing you will have to do is enter in your custom code for you Guest Portal using the instructions presented to you when you click the eye. Most users will use WinSCP to make the change.
If you need assistance please reach out to support by using the contact form or emailing your sales representative.